Scheduling
The Scheduling tab allows you to plan automatic actions on your digital outputs according to weekly schedules.
What is a Schedule?
A schedule is a time-based plan that:
- Activates or deactivates a digital output at specific times
- Repeats automatically every week
- Operates autonomously on the equipment
Usage examples:
- Automatic lighting from 8am to 6pm on weekdays
- Ventilation activated from 6am to 10pm every day
- Reduced heating on weekends
Accessing Schedules
- Access your equipment page
- Click on the "Scheduling" tab
- The "Scheduling" module must be enabled in settings
- At least one digital output must be configured
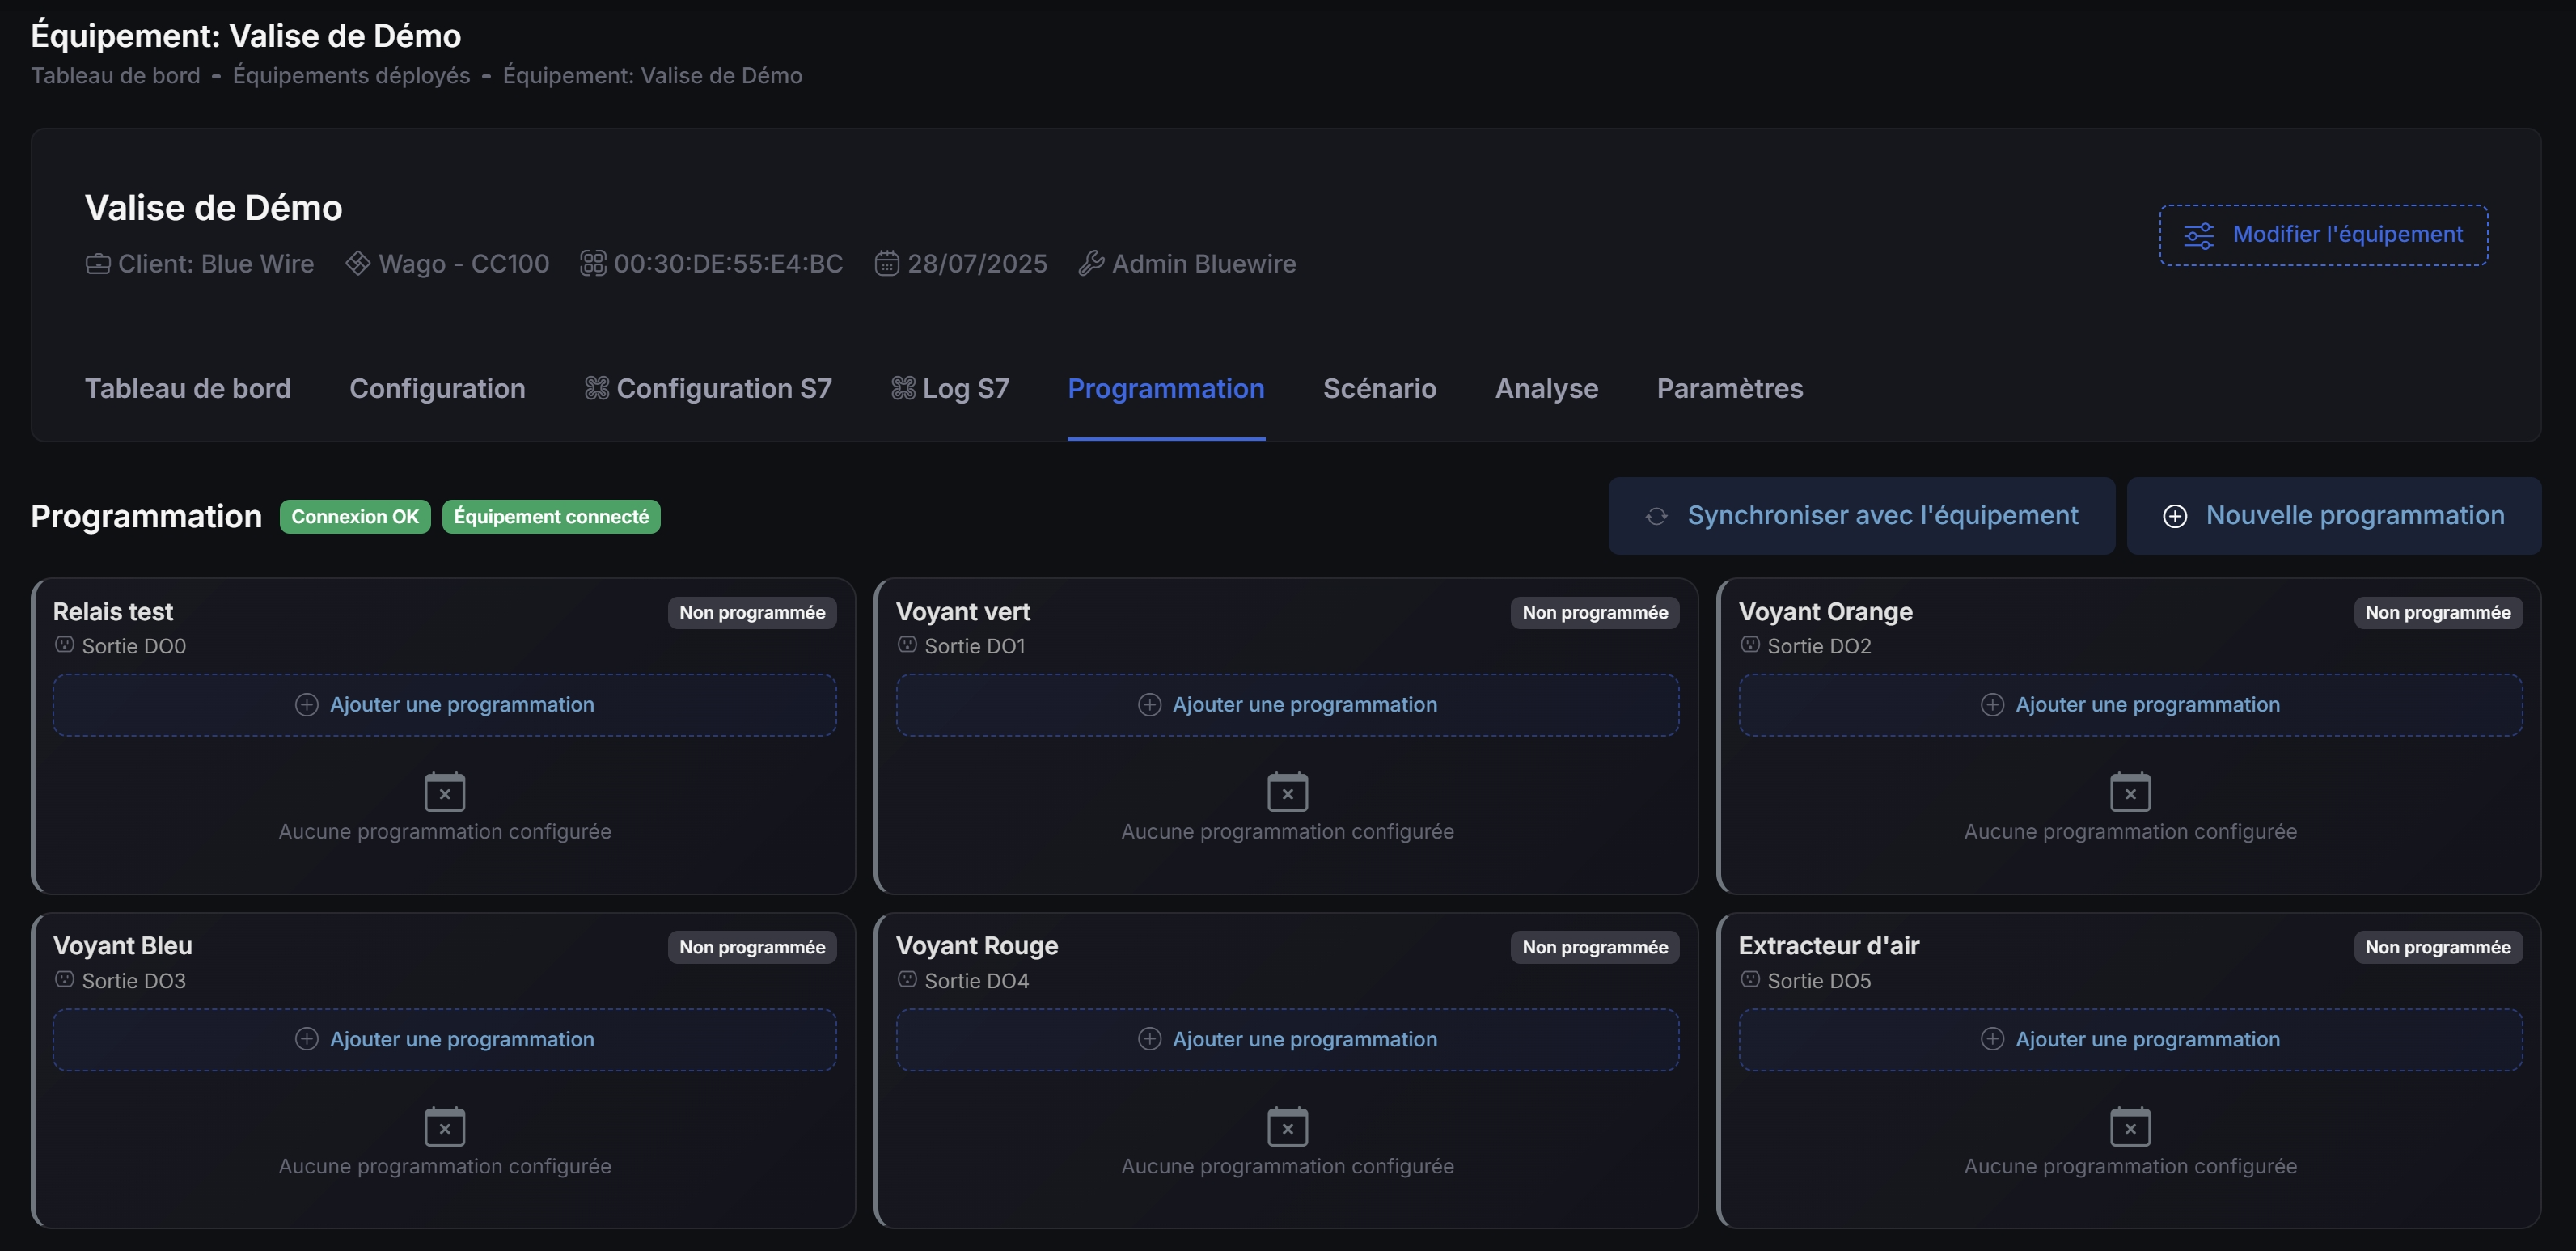
Interface Overview
Header
- Title "Scheduling"
- Connection badges: Server and equipment status
- Action buttons:
- 🔄 Synchronize with equipment
- ➕ New schedule

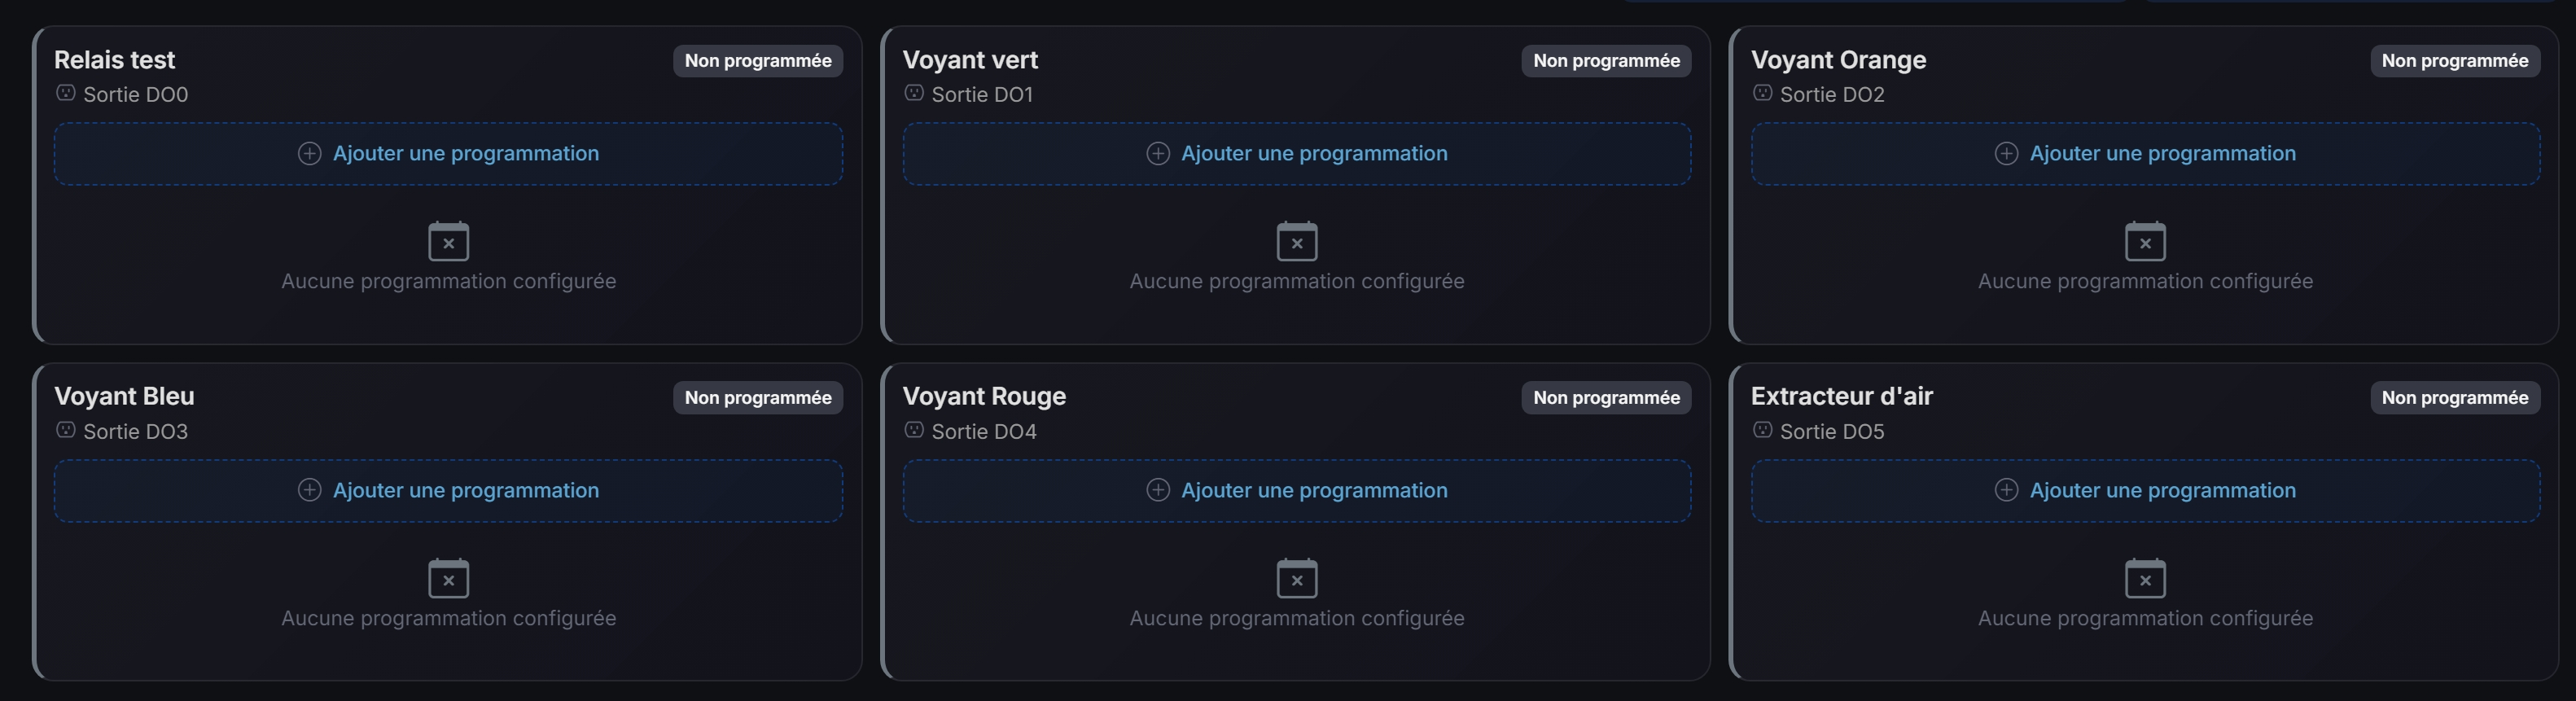
Schedule List
Existing schedules are displayed by output:
- Output name
- Associated schedules
- Status (active/inactive)
Creating a Schedule
Step 1: Open the Form
Click on the "New Schedule" button
Step 2: Select the Output
Choose the digital output to schedule from the dropdown list.

Step 3: Define the Weekly Plan
For each day of the week:
- Enable the day by checking the box
- Define the time slots:
- Start time (activation)
- End time (deactivation)
- Add multiple slots if needed (+ button)

Step 4: Save
Click on "Save" to save the schedule.
You can create multiple time slots per day. For example: 8am-12pm and 2pm-6pm to exclude lunch break.
Modifying a Schedule
- Locate the schedule in the list
- Click on the pencil icon (edit)
- Modify the times
- Save changes

Deleting a Schedule
- Locate the schedule in the list
- Click on the trash icon (delete)
- Confirm deletion
Deletion is permanent. Remember to synchronize with equipment after deletion.
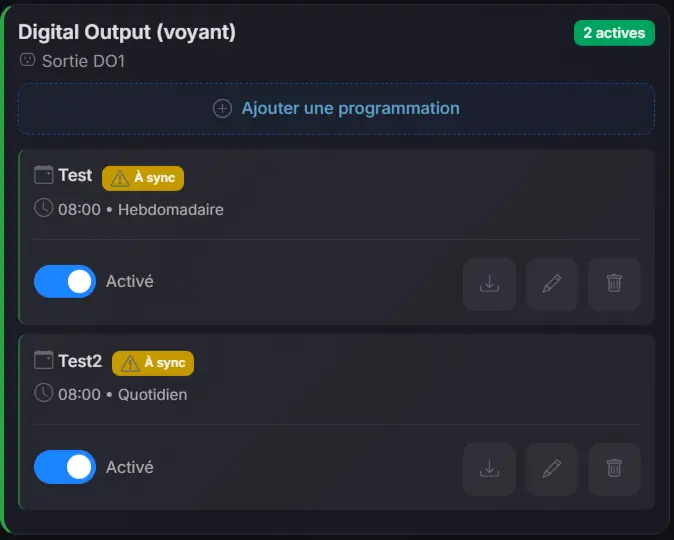
Enable/Disable a Schedule
Each schedule can be enabled or disabled individually:
- Locate the schedule
- Use the switch to enable/disable
- The schedule remains in memory but no longer executes
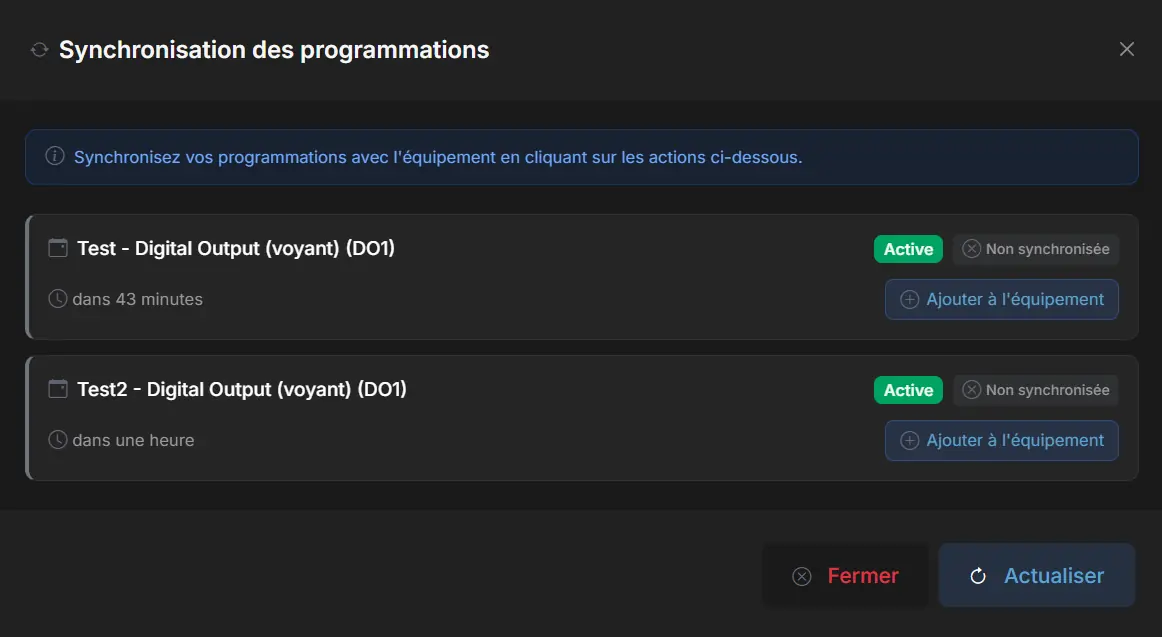
Synchronize with Equipment
Schedules are stored in two places:
- Database: Your configurations in Kodeno
- Equipment: Active schedules on the controller
Why Synchronize?
After each modification (creation, modification, deletion), you must synchronize for changes to be applied to the equipment.
Synchronization Procedure
- Click on "Synchronize with equipment"
- The synchronization modal opens
- View differences between DB and equipment
- Click on "Synchronize"
- Wait for confirmation
Synchronization States
| Badge | Meaning |
|---|---|
| 🟢 Synchronized | Identical in DB and equipment |
| 🟡 Needs update | Unsynchronized modifications |
| 🔴 Equipment only | Exists on equipment but not in DB |
Operation on Equipment
Once synchronized, schedules:
- Execute autonomously on the equipment
- Operate even if Kodeno is inaccessible
- Use the equipment's internal clock
The equipment automatically synchronizes its clock. In case of prolonged outage, there may be a temporary drift.
Practical Examples
Office Lighting
Output: Main lighting
- Monday to Friday: 7:30am - 7:00pm
- Saturday: 9:00am - 1:00pm
- Sunday: Disabled
Store Ventilation
Output: Air extractor
- Every day: 6:00am - 10:00pm
Economical Heating
Output: Heating
- Monday to Friday: 6:00am - 8:00am and 5:00pm - 10:00pm
- Saturday/Sunday: 8:00am - 10:00pm
Troubleshooting
Output doesn't switch at scheduled time
- Verify the schedule is synchronized
- Check that equipment is online
- Verify equipment time (displayed in details)
Schedule not visible after synchronization
- Refresh the page
- Check synchronization status
- Check equipment logs
Prefer scenarios for conditional automations. Schedules are ideal for purely time-based actions.